One of the greatest challenges that face an organization, that is involved in submitting or defending an extension of time or delay claims, is establishing the as-built schedule especially when the periodical schedule updates are not present or not accepted by the parties of the contract. Having an as-built schedule that can be accepted during direct claim negotiations, arbitration and courts, the schedule must be fully aligned and linked to the project’s actual progress.
Some of the Project Management Information System (PMIS) solutions like PMWeb provides a robust and comprehensive approach for developing the as-built schedule. To achieve this, the Daily Report module will be used along with PMWeb document management repository. The first step will be to import the approved baseline schedule into PMWeb to ensure that all activities that need to be updated are available for the update. The second step will be to identify the documents and records that will be used to establish the actual start and finish dates for the project schedule activities. The third step will be to create a day by day history of what has actually happened on the project using PMWeb Daily Report module. For each daily report, there will be a need to attach all supportive records, documents and pictures to verify the reported progress. The third step will be to generate the report that will compare the as-planned dates from the originally imported schedule dates and the as-built dates captured in the daily reports.
Establishing the Baseline Schedule
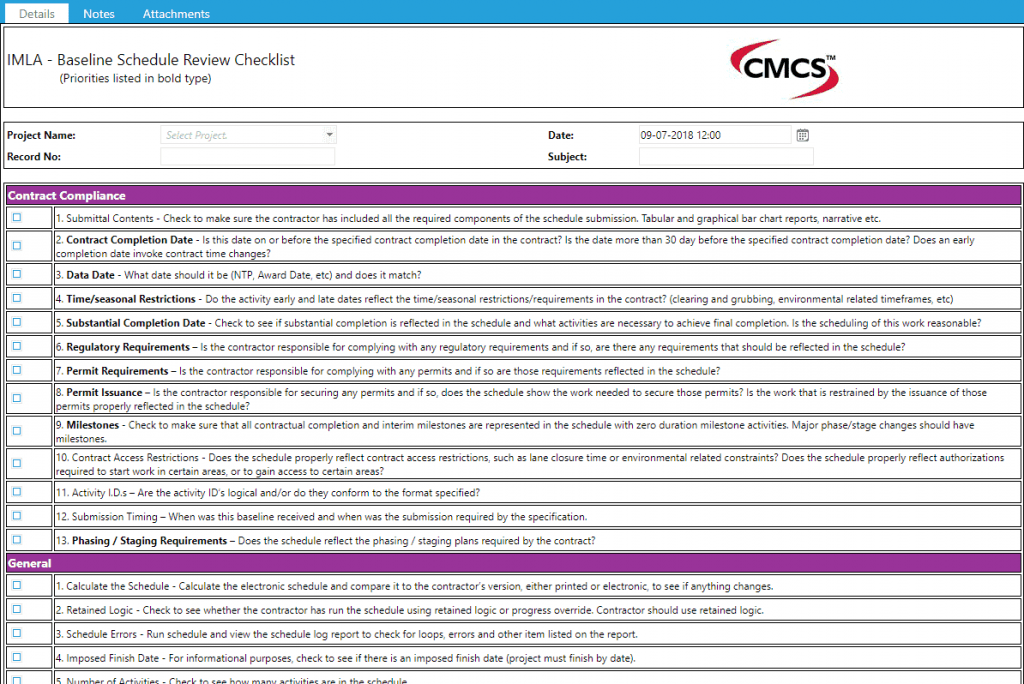
Usually for each construction project, there will be a detailed integrated project schedule that the contractor has submitted for review and approval to be established as the project baseline schedule. The project schedule is usually created using Oracle Primavera P6 or MS Project. Nevertheless, it is highly recommended that before using this schedule as the baseline or as-planned schedule, to review and analyze the schedule to ensure that it does not have any serious errors or missed information that makes using it as the as-planned schedule invalid. Therefore, it is highly recommended to have a pre-defined checklist to review and analyze the schedule. PMWeb custom form builder can be used to create the desired checklist similar to the sample checklist partially shown below.
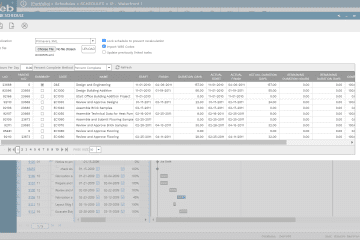
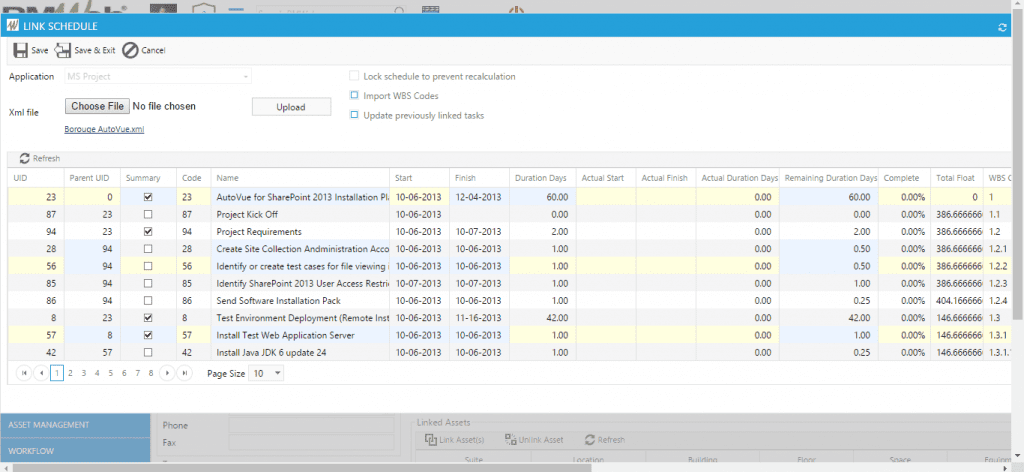
After reviewing and analyzing the project schedule and correcting or adjusting any errors that need to be formally documented and approved, the project schedule will be ready to be imported into PMWeb as the Baseline Schedule. The schedule import function in PMWeb allows importing the activity ID, description, WBS level, early start and finish dates, actual start and finish dates, percent complete, duration and total float values.
Setting the Document Management Repository
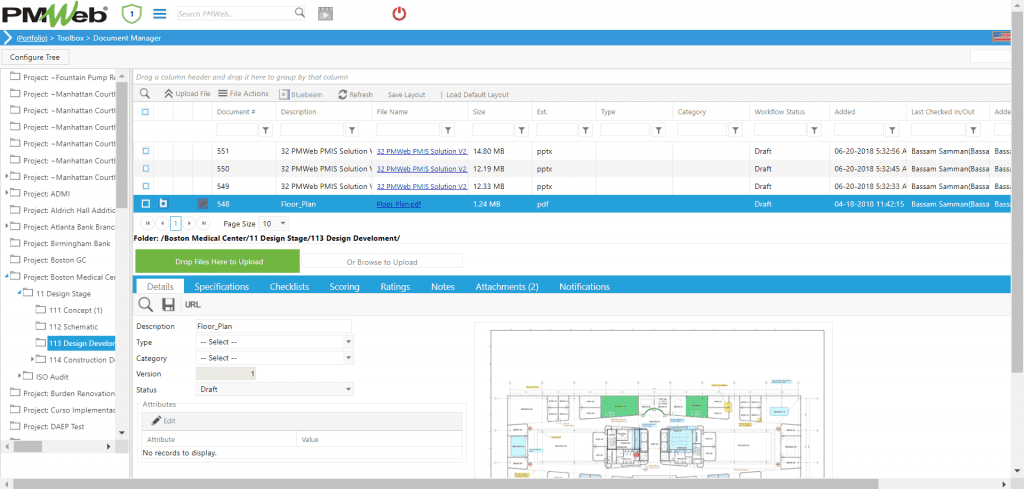
Since the main objective is to create the project’s as-built schedule, PMWeb document management repository will have folders created to match the project’s duration. In other words, a folder will be created for each week, for example W01, W02 and so on, where all project documents and records that will be needed to create the as-built schedule will be scanned, uploaded and stored into the folder that it belongs to. Those documents could include daily reports, meeting minutes, submittals, request for information, site instructions, permits among many others. PMWeb allows creating unlimited number of attributes and user defined fields to capture additional important details for each uploaded document.
Capturing Project Email Communications
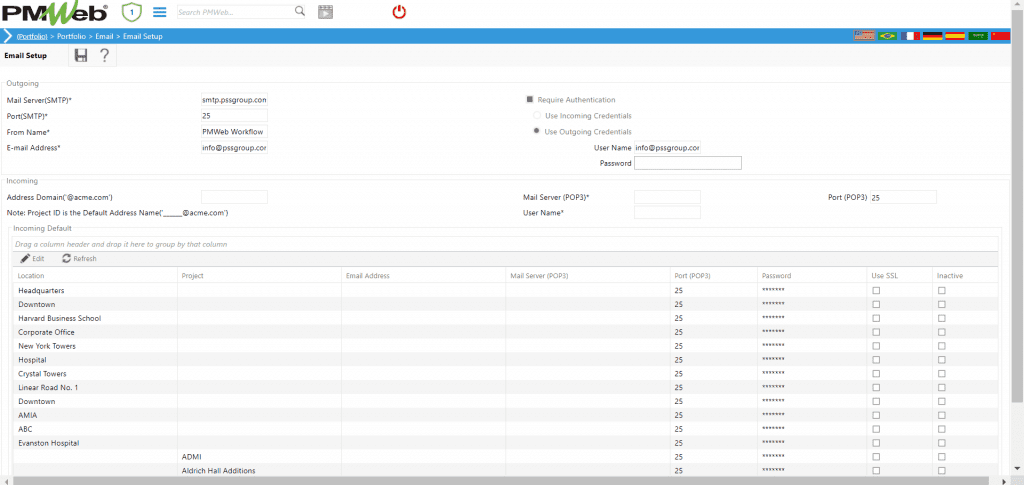
Today, there is a growing trend for using emails to communicate important project information and events that could be needed when it comes into creating the as-built schedule. PMWeb email integration module allows importing those emails into PMWeb project email folder. Those emails will become available for the team creating the as-built schedule in linking those emails to the relevant daily report.
Capturing the As-Built Schedule Dates
A daily report will be created for each day of the actual project duration to capture the actual schedule progress data. The layout of the timesheet tab of PMWeb daily report module will be configured to capture each activity that had started, progresses, finished or put on hold and percent complete for each activity that had progressed during that particular day. The description and notes text fields will be used to add the needed information relevant to that activity. In addition, PMWeb provides 10 additional user defined fields that can be configured to capture additional information on each progressed activity. For example, one the fields will be used to identify the status of the reported activity.
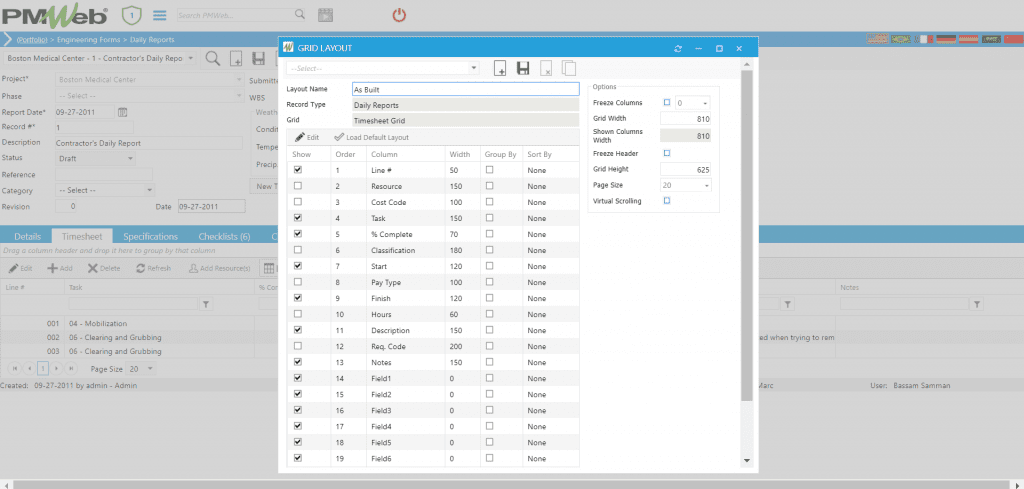
Should there be a need to capture the actual resources, labor and non-labor, hours spent against each progressed activity on that particular date, then the resource field name, actual hours, hours type as regular, overtime or weekend and cost account number need to be displayed which are available by default. Otherwise, the daily report is ready to be used to capture the actual schedule progress. The user can select the activity to be updated from the imported schedule list, then against each activity, the description of the completed works and any additional notes to be added. It should be noted that the daily report could have more than one entry for the same activity if different type of work was done on that particular activity for that particular date. Of course, this will be more important if there was a need to add resources details spent against activity.
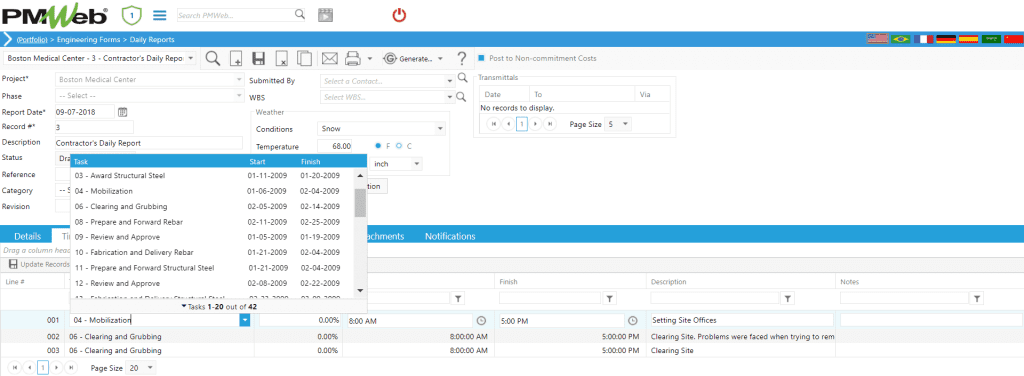
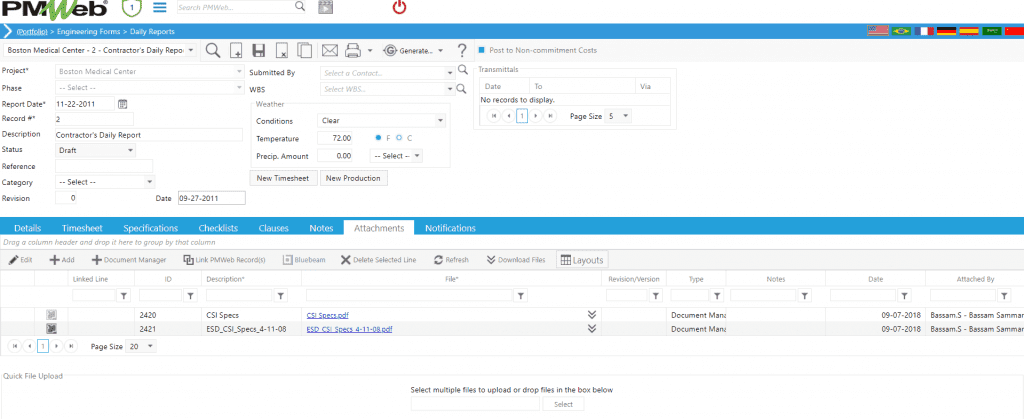
Additional data like weather conditions and other user defined fields can be added to the daily report. In addition, all supportive documents and records that were used to capture the activities progressed during that date needs to be attached to the relevant daily report. In addition, emails imported to PMWeb project email folder will be linked to the daily report module to provide the needed justification for the reported actual progress dates. When all completed, the daily report for the current day can be copied to capture the data for the next day.
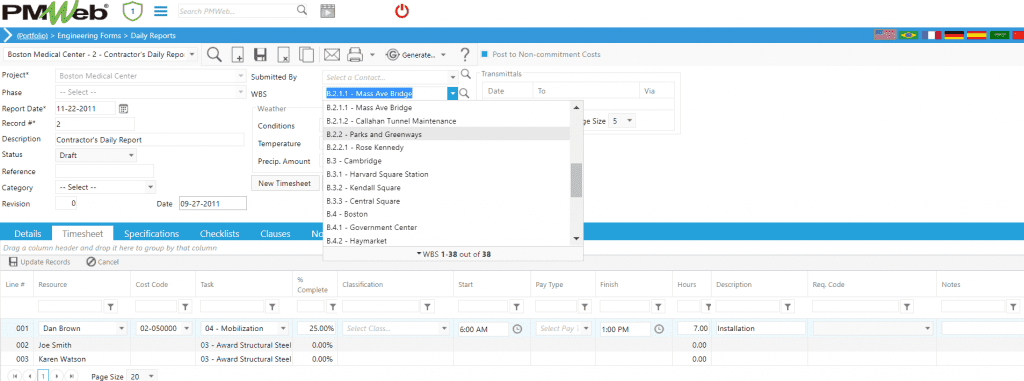
To expedite the process of creating the project as-built schedule, different project team members can be assigned to create the daily reports for the different project WBS levels. For each daily report, the WBS level will be assigned for which the as-built schedule data will be limited only to the activities that are part of that WBS level.
Reporting the As-Built Schedule
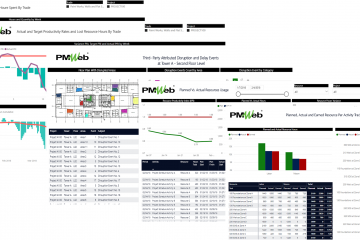
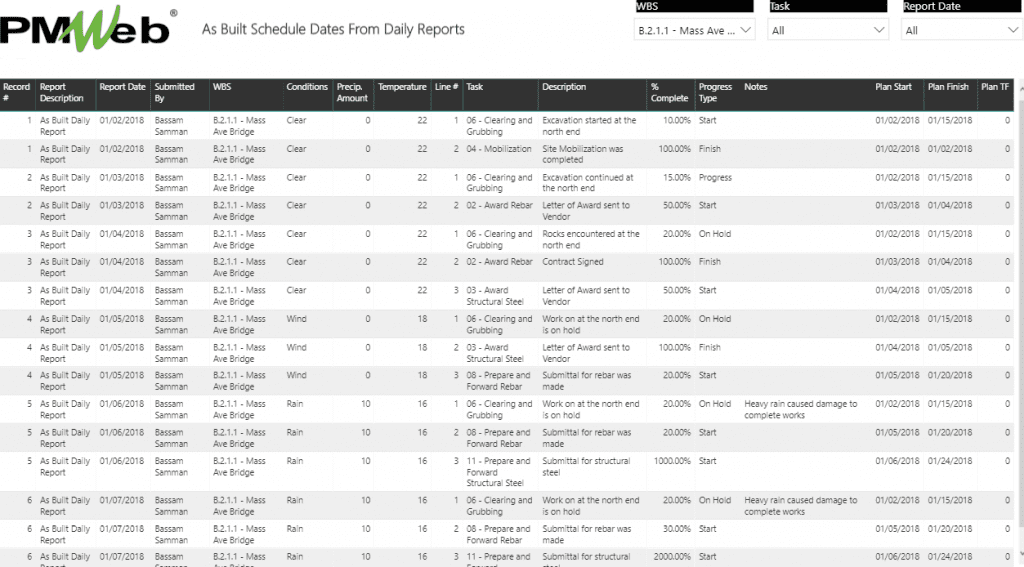
The data captured in the daily reports will be used to provide the information for the as-built schedule. The as-built schedule report will list all daily reports for every WBS level showing the activities that have started, progressed, completed or on hold. In addition, it will show the reported percent complete for activities in progress, although this is not a must. In addition, the report will provide the progress details relevant for each activity on each relevant date listing all issues that could have impacted an activity progress. The report allows selecting the daily reports that are specific for each WBS level, activity or group of activities as well as for a specific period.
Comparing As-Planned and As-Built Schedules
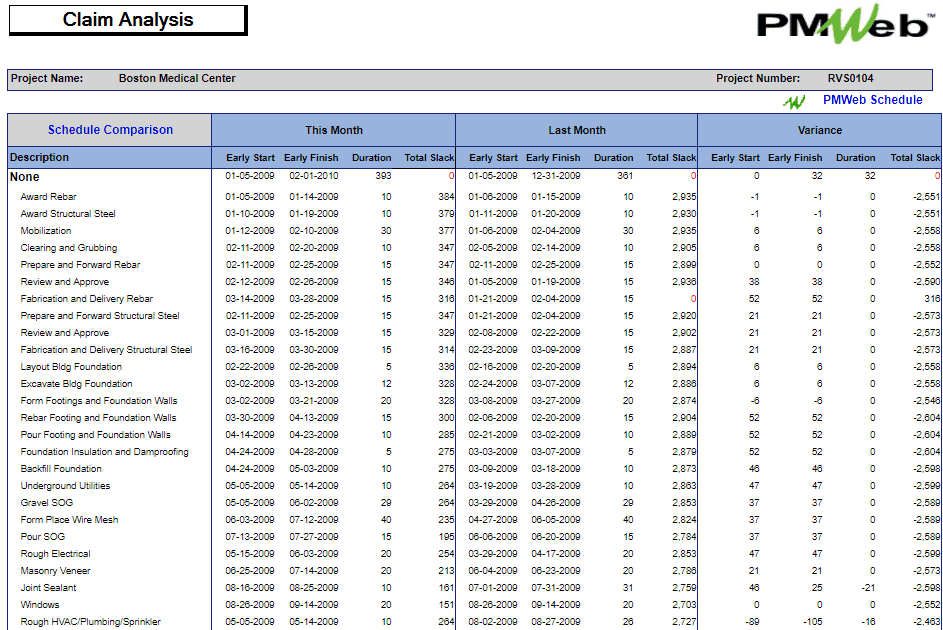
With both the as-planned and as-built schedule dates are now available, the project team can create a report to compare those dates for each activity. The comparison report will immediately identify the variances between as-planned and as-built dates. The report reader can drill down to the activity and to review the details of the actual reported progress along with the details of reported delays and disruptions that could have disrupted the activity progress.
Visualizing the Difference Between As-Planned and As-Built Schedules
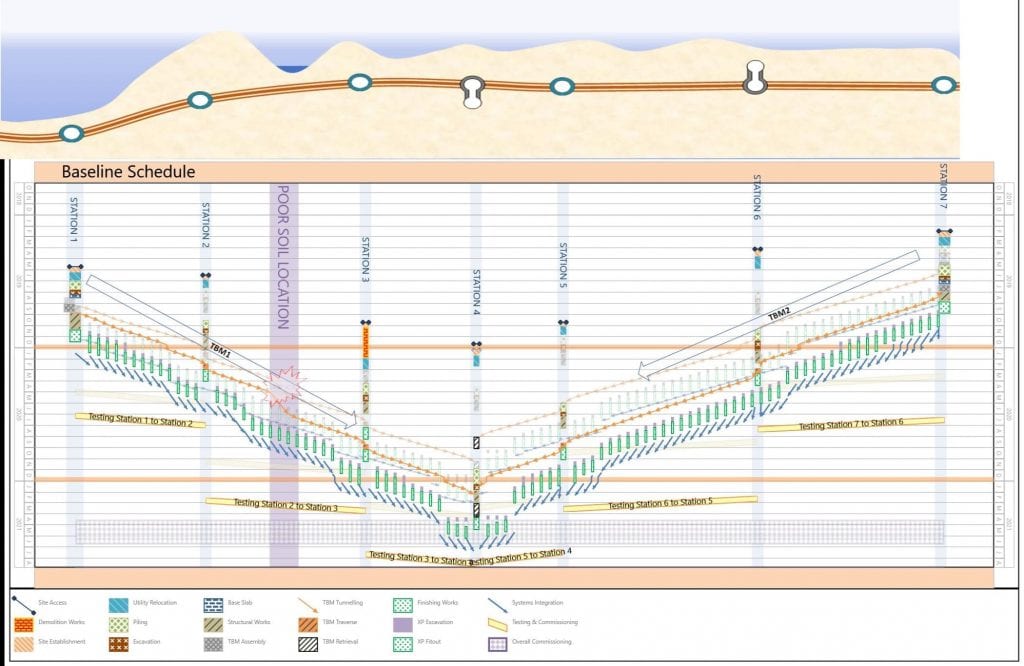
Although a bar-chart report can be created to compare the as-planned and as-built schedule dates, nevertheless, the project team might opt to have a different type of reports to compare as-planned and as-built dates. For example, projects that have repetitive type of activities like pipeline, metro, railway, highway and high-rise buildings, the project team might be interested in having the comparison between as-planned and as-built dates based on location and not WBS level.
The chart below which was created using Turbo Chart shows a comparison between as-planned and as-built dates for a metro project. The report shows that the tunneling from Station 1->4 (going left to right) started about a month late and had a slower rate than planned because it was severely impacted by poor soil at a location between station 2 and 3 thus finishing 3 months later than the as-planned dates. In addition, tunneling from Station 7->4 (going from right to left) started about 2 months late and had a slower rate than the baseline thus finishing 4.5 months later than the as-planned dates.
